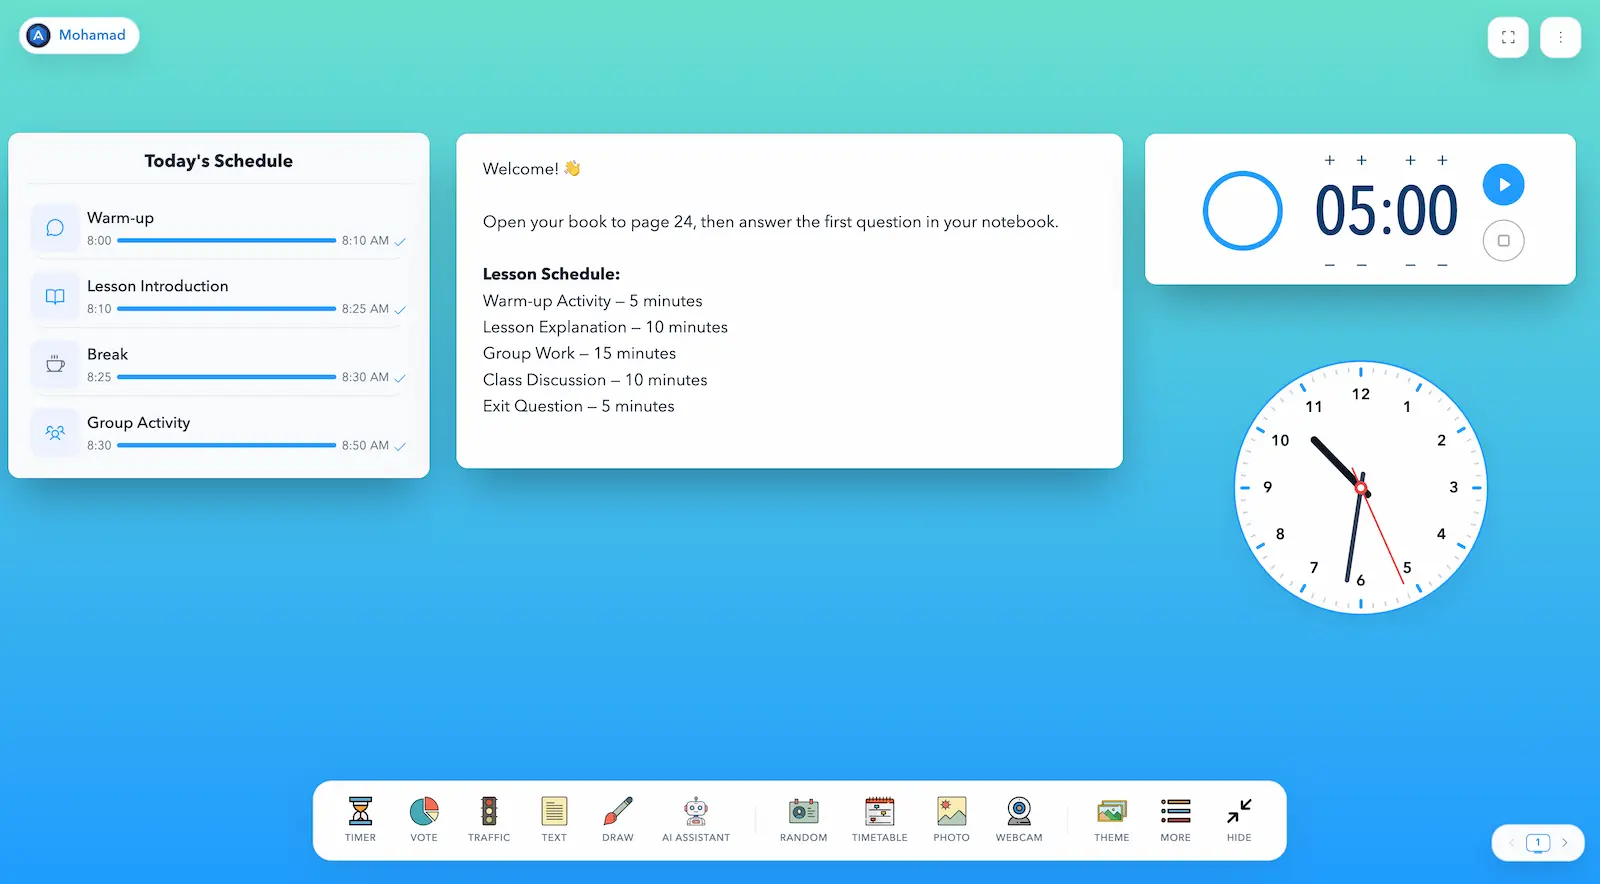
Instead of switching between several websites and applications during a lesson, prepare your classroom board in advance and display it on a projector, interactive whiteboard, second screen, or video-call screen share. Sabura works directly in your browser, with nothing to download or install.
Before You Start
For the best experience, use a laptop or desktop computer, an updated version of Google Chrome or Microsoft Edge, and a projector or large display for in-person lessons. Tools that use live or online content need a reliable internet connection.
Sabura may open on a phone or tablet, but arranging and controlling several windows is much easier on a computer.
How to Open Sabura
Visit sabura.app/app. The classroom board opens with its main tools in the bottom toolbar. Additional tools are available inside the More menu.
You do not need to learn every tool at once. Begin with the tools that solve a clear need in your lesson.
Create Your First Board in Five Minutes
For your first board, open only Notes, Timer, and Schedule.
1. Add the instructions
Open Notes and write what students should do when they look at the screen. Keep the instructions short and easy to read rather than placing every lesson detail in one window.
Open your book to page 24, read the first paragraph, and answer the question on the board.
2. Add a timer
Choose the length of the activity. A visible countdown reduces questions such as “How much time is left?” and helps students manage their work. Explain what they should do when the countdown reaches zero.
3. Show the lesson stages
Use Schedule to show the lesson order—for example, warm-up, short explanation, independent practice, discussion, and exit question. Visible stages make transitions calmer and easier to manage.
How to Move and Resize Tools
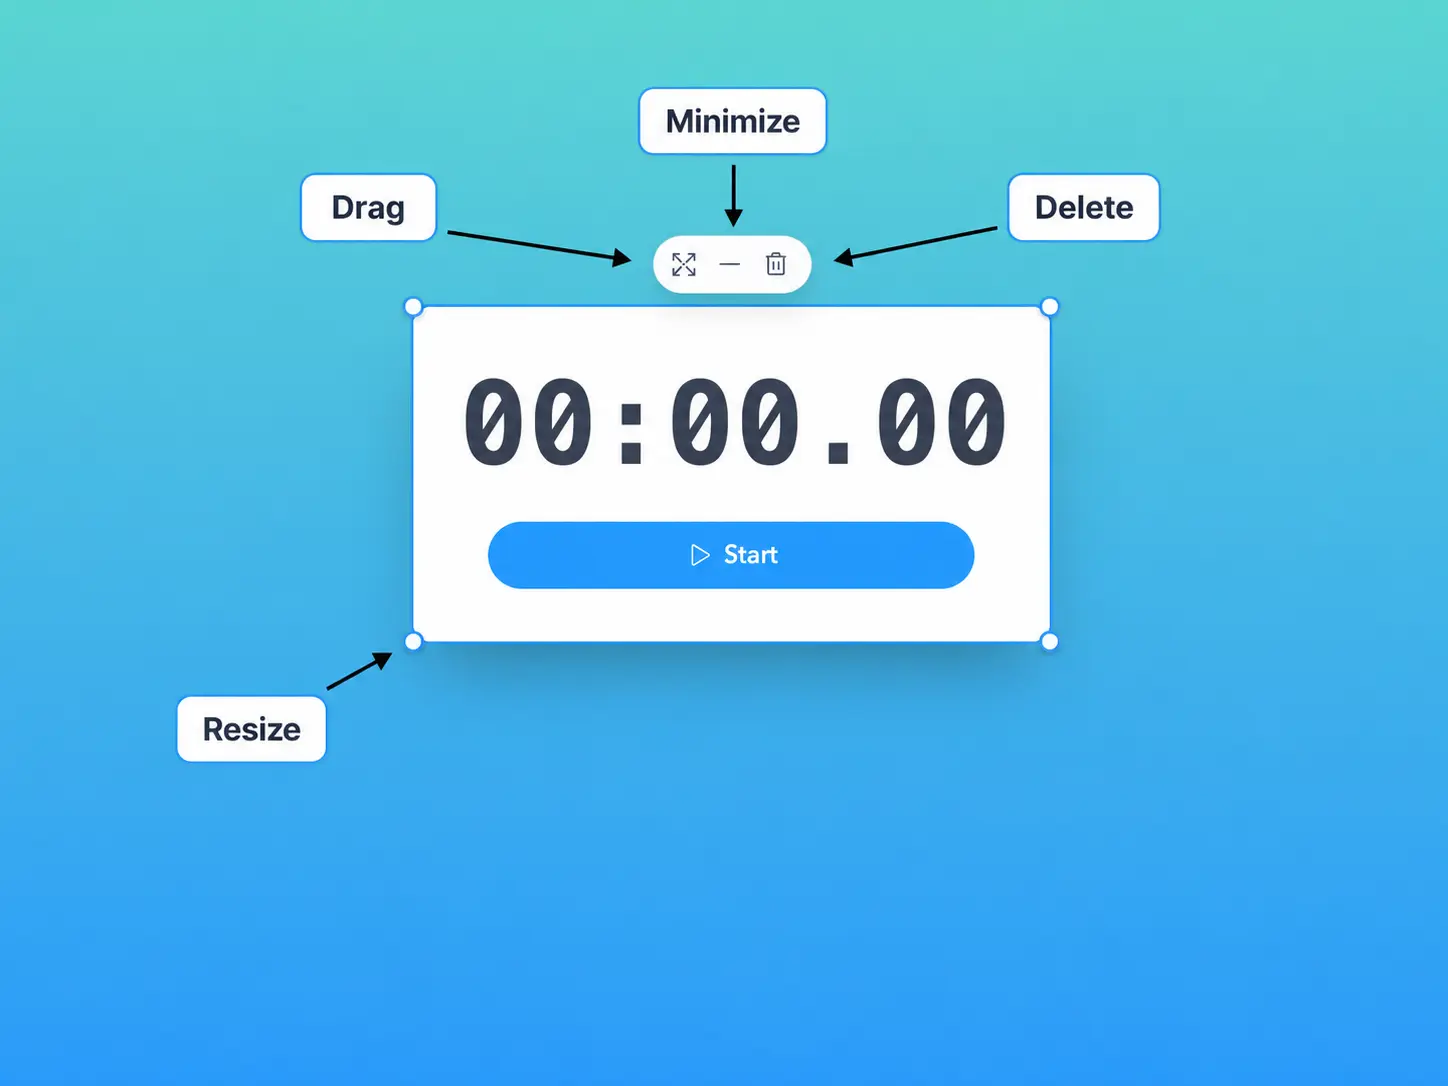
Each tool opens in its own window. Drag the top to move it, drag the corner handles to resize it, minimize it if you will need it later, or close it when the activity is finished.
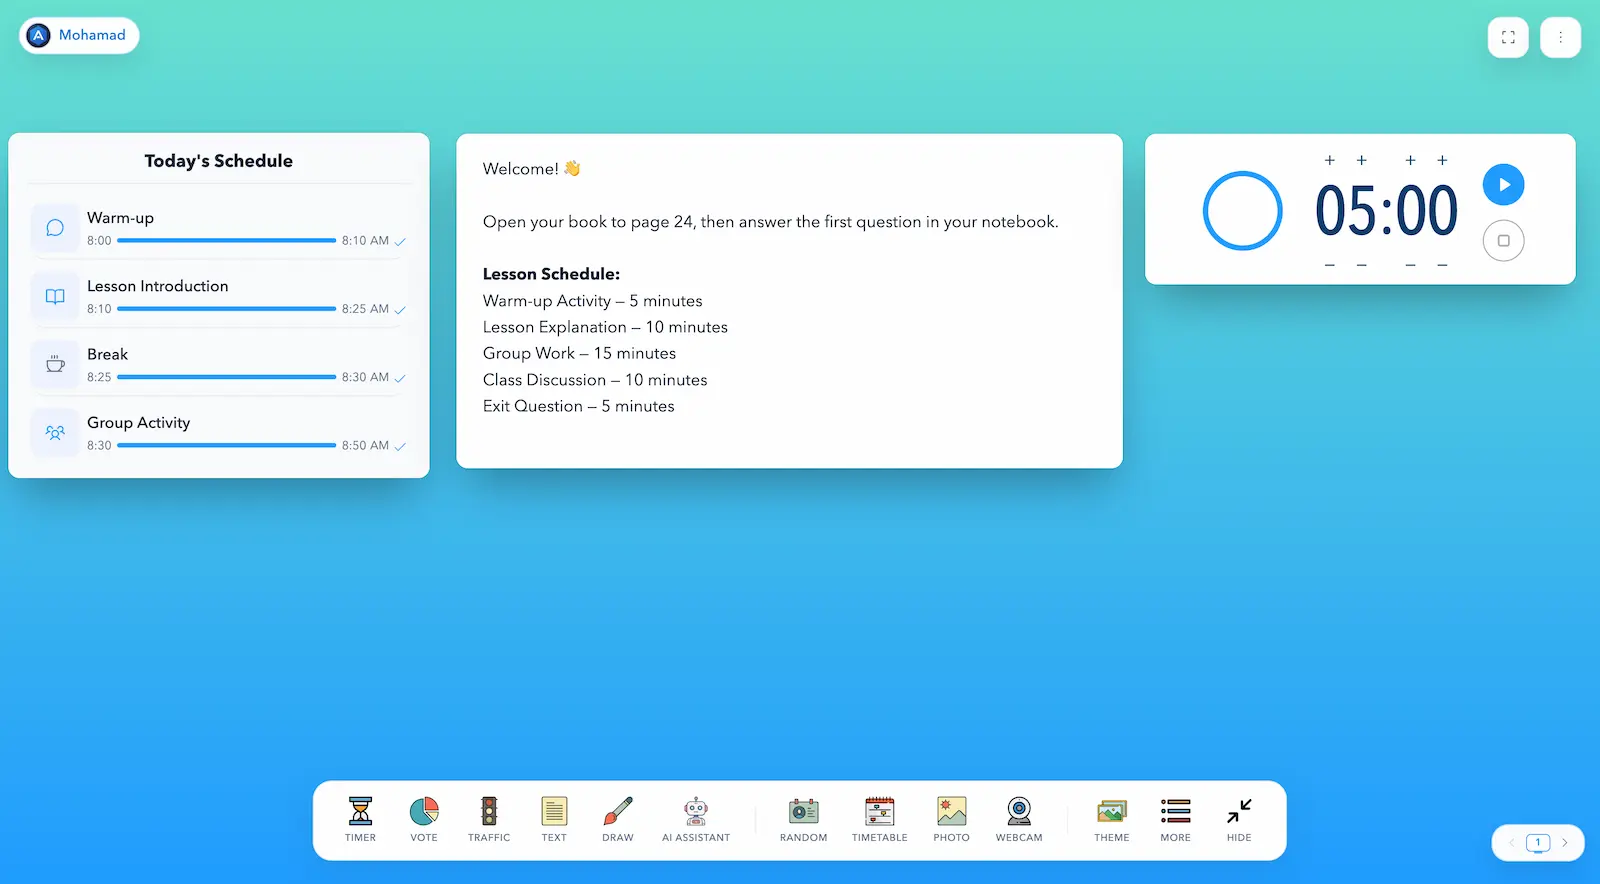
- Place instructions on one side.
- Keep the PDF or image in the centre.
- Put the timer in a visible corner.
- Place the lesson schedule on the other side.
There is no single correct layout. The goal is for students to understand the task as soon as they look at the board.
Prepare the Board Before Students Arrive
Write the learning objective and instructions, add lesson stages to Schedule, open a PDF or image, prepare student names and a voting question, make groups, and arrange the windows. Advance preparation reduces the need to search for files or open several websites in front of the class.
A 45-Minute Lesson Example
Lesson starter — 5 minutes
Display a warm-up question in Notes and start the timer. For example: “Write three things you already know about the water cycle.” Students can begin working immediately.
Introduce the topic — 10 minutes
Display a related image or PDF and use the Digital Whiteboard to explain an idea or draw a diagram. Keep the learning objective visible in a smaller Notes window.
Student activity — 15 minutes
Use Group Maker for collaborative work, display the appropriate Work Symbol, and add a timer. Noise Level can provide visual feedback that helps students manage classroom volume.
Discussion — 10 minutes
Give everyone time to think, then use Random Name Picker. Record important ideas on the Digital Whiteboard or run a quick vote to collect the class response.
End of the lesson — 5 minutes
Display an exit question in Notes, or ask the AI Teacher Assistant to create a short exit ticket. Always review and edit generated content before showing it to students.
Additional Features After Preparing Your First Board
Create and Switch Between Multiple Boards
You do not need to place every class, subject, or lesson stage on one board. Sabura lets you create multiple boards, each with its own content, open windows, and arrangement. The Board Switcher at the bottom of the screen shows the current board number.
- Use the previous and next arrows to move between existing boards.
- When you reach the final board, the next control becomes an add button for creating another board.
- Prepare each board before the lesson and switch to it when needed.
- Keep each board focused instead of crowding one screen with too many tools.
When are multiple boards useful?
- Different classes or subjects: keep separate boards for mathematics, science, or languages.
- Lesson stages: use one board for the warm-up, another for student work, and another for review and the exit question.
- Learning stations: prepare a separate board with the instructions, timer, and resource for each station.
- Alternative activities: prepare a backup task and open it without rearranging the main board.
- Repeated routines: keep dedicated boards for morning routines, reading, or collaborative work.
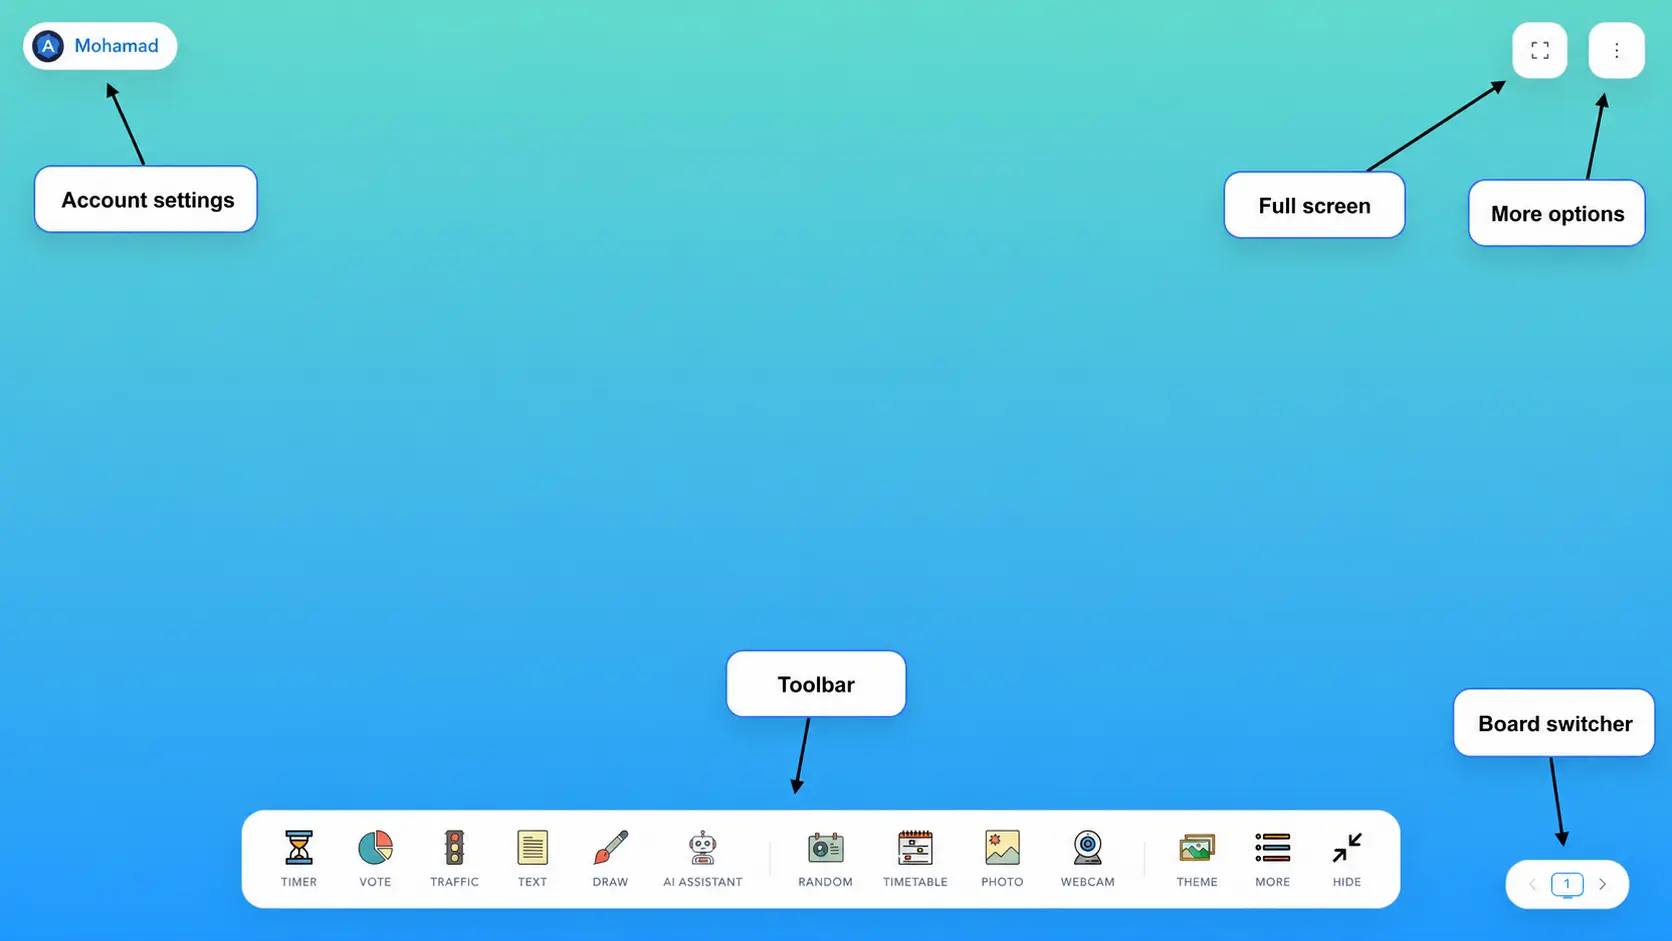
What do the main controls do?
- Account Settings: sign in and manage your account settings.
- Full Screen: give the board more display space on a projector or interactive whiteboard.
- More Options: access list settings, the public board link, and teacher-support links.
- Toolbar: open lesson tools and hide the toolbar after preparing the screen.
- Board Switcher: see the current board number, move to another board, or add a new one.
Using Sabura in an Online Lesson
Sabura does not replace Zoom or Google Meet. Use the meeting platform for video and audio, then share your Sabura screen to display instructions, the timer, lesson schedule, images, files, discussion questions, and live voting. This keeps lesson information organized instead of spreading it across messages and tabs.
Does Sabura Work on Interactive Whiteboards?
Yes. If the interactive whiteboard can display a browser, open Sabura directly or show it from a connected computer. A laptop or desktop is easier when opening several windows or uploading files. Use full-screen mode, then hide the toolbar after opening the tools you need.
How to Keep the Screen Clear
Before opening a tool, ask whether students need to see it at that point. A clear classroom board should answer four questions:
- What should students do?
- How much time do they have?
- Which material should they use?
- What will happen next?
Close or minimize tools that are no longer needed. Three or four well-arranged tools are usually enough for one stage of a lesson.
What to Do When a Tool Does Not Work
- Refresh the page.
- Close the Sabura tab and open it again.
- Check your internet connection.
- Update your browser or try Chrome or Edge.
- Allow camera or microphone access when required.
- Temporarily disable browser extensions that may block website features.
If the problem continues, send the Sabura team a clear screenshot, the tool name, any error message, your device and browser, and the file you were trying to open when relevant.
Prepare a simple board for your next lesson: clear instructions, a timer, and a short schedule.
Start Using Sabura